
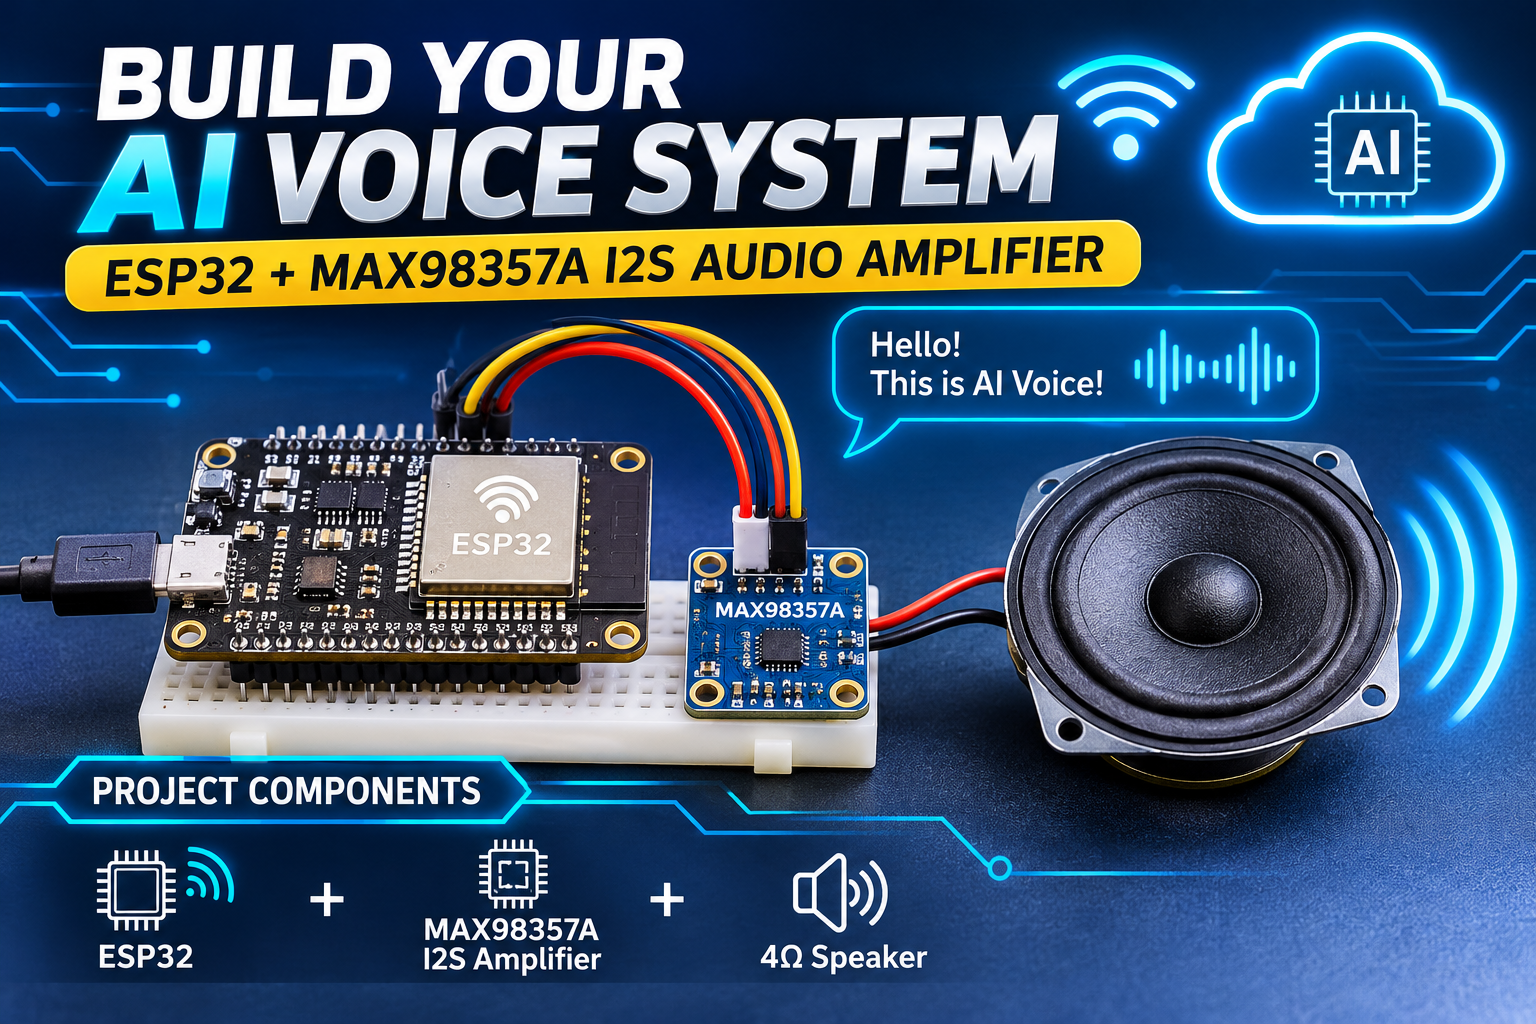
Introduction
What if your ESP32 project could speak? Text-to-Speech (TTS) technology converts written text into natural-sounding spoken audio — and with the power of the ESP32's Wi-Fi and a compact MAX98357A I2S digital amplifier, you can build a complete AI voice output system for under ₹2,000.
This project uses the ESP32 to fetch text from a web API or a predefined message, send it to a cloud-based TTS engine (such as Google TTS or ElevenLabs API) over Wi-Fi, receive the audio stream, and play it back in real time through the MAX98357A amplifier and a speaker — all with no external audio codec required.
Perfect for smart home announcements, IoT alert systems, accessibility devices, voice assistants, robot speech, and college AI/IoT projects. All components are available at Anil Electronic Store, Ahmedabad.
What You'll Build
- An ESP32-based system that converts any text string into spoken audio
- Uses the MAX98357A I2S Class-D amplifier — no analogue audio codec needed
- Fetches TTS audio from Google Translate TTS API over Wi-Fi
- Streams and plays MP3 audio directly through a 3W speaker
- Triggered via serial command, button press, or HTTP request
- Expandable to full voice assistant with INMP441 microphone
- Total build time: ~2 hours
How It Works
The system works in four clear stages:
- Text Input: A text string is defined in the ESP32 code, received via Serial Monitor, or fetched from an MQTT topic or HTTP endpoint.
- TTS API Request: The ESP32 connects to your home Wi-Fi and sends an HTTPS GET request to the Google Translate TTS API (or ElevenLabs / VoiceRSS API), passing the text as a parameter. The API returns an MP3 audio stream.
- I2S Audio Output: The ESP32 decodes the MP3 stream using the ESP8266Audio library and sends the decoded PCM audio data over the I2S (Inter-IC Sound) protocol to the MAX98357A amplifier.
- Speaker Playback: The MAX98357A converts the digital I2S signal into a powerful analogue output — up to 3W — driving the speaker directly with clean, amplified audio.
Why MAX98357A for I2S Audio?
The MAX98357A is a filterless Class-D audio amplifier with a built-in I2S digital audio interface. It is ideal for ESP32 projects because:
- ✅ No analogue signal path — takes digital I2S directly from ESP32, eliminating noise
- ✅ No external components — built-in filter, no capacitors or inductors needed
- ✅ 3W output into 4Ω speaker — loud and clear for room-level audio
- ✅ 3.3V logic compatible — perfect for ESP32's 3.3V I/O pins
- ✅ Tiny footprint — fits neatly on a breadboard or custom PCB
- ✅ Low power — shuts down automatically when no audio signal is present
Components Required (BOM)
All components below are in stock at anilestore.com with same-day dispatch before 2 PM. See the kit panel on this page to add everything in one click.
Circuit Connections
MAX98357A I2S Amplifier → ESP32:
- VIN → 3.3V or 5V (both work; 5V gives louder output)
- GND → GND
- BCLK (Bit Clock) → GPIO 27
- LRC (Left/Right Clock / Word Select) → GPIO 26
- DIN (Data In) → GPIO 25
- SD (Shutdown / Gain) → Leave floating for stereo mix, or tie to 3.3V for left channel only
Speaker → MAX98357A:
- Speaker + → OUT+
- Speaker – → OUT–
- Use a 3W 4Ω or 8Ω speaker — both are compatible
Push Button (optional trigger) → ESP32:
- One leg → GPIO 0 (Boot button, already on most ESP32 boards)
- Other leg → GND
- Or use any GPIO with internal pull-up:
pinMode(pin, INPUT_PULLUP)
INMP441 Microphone (optional — for voice input upgrade) → ESP32:
- VDD → 3.3V
- GND → GND
- SD (Data) → GPIO 32
- SCK (Clock) → GPIO 14
- WS (Word Select) → GPIO 15
- L/R → GND (selects left channel)
Power:
- Power the ESP32 via USB from a laptop or 5V USB adapter
- For portable use, connect a 3.7V 18650 Li-ion cell with a TP4056 charging module and a 5V boost converter to power the ESP32's USB or VIN pin
⚠️ Important: The MAX98357A's I2S pins must be connected to the correct ESP32 GPIOs as the I2S peripheral is hardware-mapped. Use GPIO 25, 26, 27 as listed — do not swap these arbitrarily.
Required Libraries
Install the following libraries via Arduino IDE Library Manager (Sketch → Include Library → Manage Libraries):
- ESP8266Audio by Earle F. Philhower III — search "ESP8266Audio" (works on ESP32 too)
- ArduinoJson by Benoit Blanchon — for parsing API responses
- WiFiClientSecure — built into ESP32 Arduino core, no install needed
Also ensure your Arduino IDE has the ESP32 board package installed:
- Go to File → Preferences and add this URL to Additional Board Manager URLs:
https://raw.githubusercontent.com/espressif/arduino-esp32/gh-pages/package_esp32_index.json - Go to Tools → Board → Board Manager, search esp32 by Espressif Systems, and install.
- Select ESP32 Dev Module as your board.
Arduino Code — ESP32 Text-to-Speech
// AI Text-to-Speech with ESP32 + MAX98357A
// Uses Google Translate TTS API + ESP8266Audio Library
// Anil Electronic Store – anilestore.com

#include <WiFi.h>
#include <WiFiClientSecure.h>
#include <AudioGeneratorMP3.h>
#include <AudioOutputI2S.h>
#include <AudioFileSourceHTTPStream.h>

// ===== CONFIGURE THESE =====
const char* ssid     = "YOUR_WIFI_SSID";
const char* password = "YOUR_WIFI_PASSWORD";
// ===========================

// I2S Pins for MAX98357A
#define I2S_BCLK  27
#define I2S_LRC   26
#define I2S_DOUT  25

AudioGeneratorMP3    *mp3;
AudioOutputI2S       *out;
AudioFileSourceHTTPStream *file;

String buildTTSUrl(String text) {
  // URL-encode spaces and special characters
  text.replace(" ", "%20");
  text.replace(",", "%2C");
  text.replace("!", "%21");
  text.replace("?", "%3F");

  // Google Translate TTS endpoint
  return "https://translate.google.com/translate_tts?ie=UTF-8&q="
         + text
         + "&tl=en&client=tw-ob";
}

void speakText(String text) {
  Serial.println("Speaking: " + text);

  String url = buildTTSUrl(text);
  Serial.println("TTS URL: " + url);

  file = new AudioFileSourceHTTPStream(url.c_str());
  out  = new AudioOutputI2S();
  out->SetPinout(I2S_BCLK, I2S_LRC, I2S_DOUT);
  out->SetGain(0.8); // 0.0 to 1.0 — adjust volume here

  mp3  = new AudioGeneratorMP3();
  mp3->begin(file, out);

  while (mp3->isRunning()) {
    if (!mp3->loop()) {
      mp3->stop();
    }
    yield(); // Keep Wi-Fi stack alive during playback
  }

  delete mp3;
  delete out;
  delete file;
  Serial.println("Done speaking.");
}

void setup() {
  Serial.begin(115200);
  delay(500);

  Serial.print("Connecting to Wi-Fi");
  WiFi.begin(ssid, password);
  while (WiFi.status() != WL_CONNECTED) {
    Serial.print(".");
    delay(500);
  }
  Serial.println("\nConnected! IP: " + WiFi.localIP().toString());

  // Speak on boot
  speakText("Hello! I am your ESP32 voice assistant. Ready to speak!");
}

void loop() {
  // Speak when you type text into Serial Monitor
  if (Serial.available()) {
    String input = Serial.readStringUntil('\n');
    input.trim();
    if (input.length() > 0) {
      speakText(input);
    }
  }
  delay(100);
}
How to Use After Uploading
- Upload the sketch to your ESP32 via USB.
- Open the Serial Monitor at 115200 baud.
- Wait for
Connected! IP: ...to appear. - The ESP32 will immediately speak the boot message through the speaker.
- Type any sentence into the Serial Monitor and press Enter — the ESP32 will speak it aloud within 1–2 seconds.
Step-by-Step Assembly
- Place the ESP32 on the breadboard. The ESP32-WROOM-32 38-pin board straddles the centre of an 830-point breadboard with pins on both sides accessible.
- Place the MAX98357A module on the breadboard a few rows away from the ESP32. This module typically comes as a breakout board with 7–8 pins. Connect VIN, GND, BCLK, LRC, and DIN using jumper wires as per the circuit connections above.
- Connect the speaker. Solder or use screw terminals to connect the speaker's two wires to the MAX98357A's OUT+ and OUT– pads. The 3W 4Ω speaker from the BOM is ideal.
- Connect INMP441 microphone (optional) if you want voice input capability for the future upgrade. Mount it on the breadboard and wire to ESP32 as per the circuit connections above.
- Double-check all connections — especially that BCLK → GPIO 27, LRC → GPIO 26, DIN → GPIO 25. Wrong I2S pin assignment is the most common cause of no audio output.
- Power via USB and upload the code. The ESP32's onboard 3.3V regulator powers both the ESP32 and the MAX98357A cleanly via USB.
Adjusting Volume and Audio Quality
- Volume: Change the
SetGain(0.8)value between0.0(silent) and1.0(maximum). Values above 1.0 may cause distortion. - Speaker impedance: A 4Ω speaker gives maximum power (3W) from the MAX98357A. An 8Ω speaker gives about 1.4W but with less heat. Both work fine.
- Language: Change
&tl=enin the URL to&tl=hifor Hindi,&tl=gufor Gujarati,&tl=tafor Tamil, etc. — full multilingual support! - Speed: Add
&ttsspeed=0.8to the URL to slow the speech down, or&ttsspeed=1.2to speed it up.
Upgrading to ElevenLabs AI Voice
For ultra-realistic AI-generated voices, you can replace the Google TTS endpoint with the ElevenLabs API:
- Create a free account at elevenlabs.io and get your API key
- Replace the
buildTTSUrl()function with an HTTPS POST request tohttps://api.elevenlabs.io/v1/text-to-speech/{voice_id} - Include your API key in the request headers:
xi-api-key: YOUR_KEY - The response is an MP3 stream — the rest of the audio playback code remains the same
ElevenLabs offers Indian English voices that sound indistinguishable from a real human speaker — perfect for accessibility tools and product demos.
Troubleshooting Tips
- No audio / silence: Verify BCLK, LRC, and DIN pin connections. Confirm
SetPinout(27, 26, 25)matches your actual wiring. Ensure MAX98357A VIN is connected and powered. - Distorted or crackling audio: Lower the gain value in
SetGain(). Try powering the MAX98357A from 5V instead of 3.3V for cleaner output. Use a shorter speaker wire. - Wi-Fi connects but no TTS audio: The Google TTS API may be rate-limited. Wait a few seconds and try again. Alternatively, switch to VoiceRSS or ElevenLabs API.
- ESP32 crashes / reboots during playback: This is a memory issue. Ensure you are using the latest ESP8266Audio library. Try reducing the MP3 buffer size in the library settings.
- Board not detected by PC: Install the CP2102 or CH340G USB driver for your specific ESP32 board variant. The driver download link is in the product listing on our store.
Upgrades & Next Steps
- Add an INMP441 I2S microphone for voice input — build a full two-way voice assistant
- Connect an OLED display to show the text being spoken in real time
- Use MQTT to receive text from Node-RED, Home Assistant, or any IoT platform and speak it aloud
- Add a pushbutton to cycle through pre-defined announcements — ideal for factory floor or public address systems
- Integrate with ChatGPT API over Wi-Fi for a fully conversational AI assistant
- Build a multilingual announcement system using the
&tl=language parameter — announce in Hindi, Gujarati, and English automatically - Use an SD card module with the ESP8266Audio library to play locally stored MP3 files for offline operation
Real-World Applications
- 🏠 Smart home announcements — "Front door open", "Washing machine done"
- 🏭 Factory floor alerts — spoken safety warnings and status updates
- ♿ Accessibility devices — text-to-speech for visually impaired users
- 🤖 Robot voice output — give your robot project a voice
- 🏫 Smart classroom — IoT-triggered pronunciation practice tool
- 🛒 Retail display — product announcement system triggered by proximity sensor
- 🚨 IoT alert system — spoken alerts when sensor thresholds are breached
Why Buy from Anil Electronic Store?
- ✅ Genuine ESP32 boards — original Espressif WROOM-32 modules, not untested clones
- ✅ MAX98357A breakout modules — tested I2S audio output verified before dispatch
- 🚚 Same-day dispatch for orders placed before 2 PM from Ahmedabad
- 🧾 Official GST invoice — perfect for college project budget reimbursements
- 📲 Free WhatsApp engineer support — we help you get audio working, step by step
- 📦 Delivery across 19,000+ PIN codes all over India
Conclusion
The AI-based Text-to-Speech system with ESP32 and MAX98357A is one of the most impressive IoT projects you can build — combining Wi-Fi connectivity, cloud AI APIs, digital audio protocols, and hardware amplification into a single compact circuit that genuinely speaks.
Whether you're building a smart home voice assistant, a talking robot, an accessibility device, or just want to hear your ESP32 say something — this project delivers real results with clean, loud, and clear audio output.
All components in the BOM below are 100% genuine, in stock, and ready to dispatch from Anil Electronic Store. Order before 2 PM for same-day shipping across India. Build something that speaks for itself! 🔊⚡